Getting Started
To install this theme you must have a working WordPress already installed on your web-hosting. For information in regard to installing the WordPress platform, please see the WordPress Codex - http://codex.wordpress.org/Installing_WordPress
If you are new to WordPress it’s better to read Guides about basic WordPress functionality firstly, which you can find at http://wordpress.org. This Guide describes only current Theme specifics.
Theme installation
To install theme you should upload theme files into the proper directory and activate theme. You have two ways to upload theme files:
- WordPress Upload: Navigate to Appearance > Themes > Add New > Upload Theme. Select the zipped theme folder and it will be uploaded and installed.
- FTP Upload: Using your FTP client, upload the non-zipped theme folder into the /wp-content/themes/ folder on your server.
Once the theme is uploaded, you need to activate it. Go to Appearance > Themes and activate your new theme.
Installation of Bundled Plugins
Once the theme is activated you will see a suggestion to install recommended plugins, which supplied with a theme. To get full Theme functionality you should install and activate them.
Demo content
You can import demo content just in a one click, which will give you the start point for the building of your site (Tools > Demo content). See the “Demo Content” section for more details.
Live Customizer
This Theme supports WordPress Theme Customizer Feature (Appearance > Customize). You can cutomize colors, few other options and see changes live. Also, please, note that full list of options is available only in the "Theme Options" section of the back-end.
Theme Options
After theme installation navigate to Theme Options (Theme Options section of the back-end), take a look at available options to gain an understanding of what can be changed and set the prefered options. Also you can modify options at any time later.
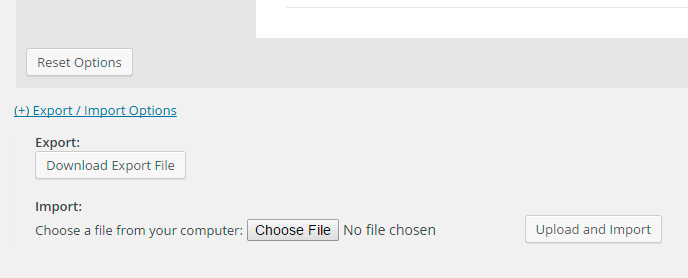
Theme Options: Export / Import
You can export current saved options to a file and import options values from the file. You can do it by navigating to the bottom of the options page.
Setting up the Homepage
By default WordPress sets the front page as a Blog index Page. You can set as a Front page any custom page.
To set a custom page as front page do the following: navigate to Pages > Add New. Enter page title and content, then click “Publish”.
Once you have created your new page which you want to be a “Front page”, navigate to Settings > Reading and configure the “Front Page Displays” setting. Select the static page option and choose the page you just created as your front page.
Setting up the Blog
To set up the blog, you have to create a new page, you can do so by navigating to Pages > Add New. You do not have to include any content. Select “Blog” template from the Page Attributes section and click “Publish”.
Once you have created blog index page you can add posts to the blog (Posts > Add New). Blog options can be set under Theme Options > Blog Options.
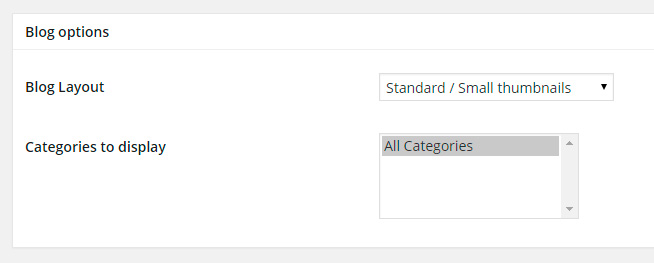
Blog Layouts
Once "Blog" template is chosen for the page, "Blog options" options box appears below the content editor. You can choose layout of the blog page in this options box:
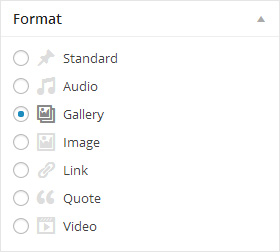
Blog Post Formats
There are 7 formats of blog post supported in the theme:
- Standard
- Audio
- Gallery
- Image
- Link
- Quote
- Video
Choose one of the predefined format when you create or edit post using this box:
Post format: Standard
Standard format. You can set featured image for post, which will be visible on the blog page. This image can be displayed on the single post page before the content or not (see Theme options > Blog options).
Post format: Audio
You can attach audio file to post and the post will be displayed with the player. To attach the file click “Browse” button on the “Audio Settings” pane, upload the file or select existing one from the Media Library. Also you can just provide an embed code for the audio file hosted with the media service (e.g. SoundCloud)
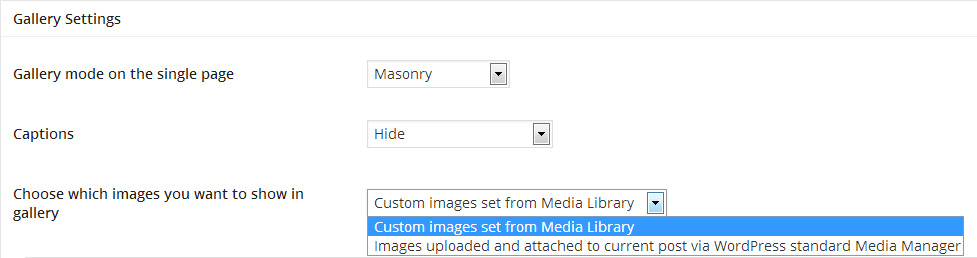
Post format: Gallery
You can attach Images Gallery to the post. You can choose which images should display the gallery using Gallery Settings box. You can choose to display images attached to the post or you can display custom set of images from the Media Library.
Post format: Image
It’s a post with single image, it looks like standard post with featured image. Just specify featured image for the post. This picture will be displayed also on the single post page before the content.
Post format: Link
Enter the URL at the “Link Settings” pane and the link will be displayed in the post.
Post format: Quote
Enter a quote and an author at the “Quote Settings” pane and it will be displayed in the post.
Post format: Video
You can attach video file to post or insert embed code provided by video-hosting service (YouTube, Vimeo, etc.) and the post will be displayed with the player. To attach video file click “Browse” button on the “Video Settings” pane, upload the file or select existing one from the Media Library. To insert embed code just insert it into Embeded Code field.
Setting up the Portfolio
Portfolio functionality is powered by "Olevmedia Portfolio" plugin, which supplied with the Theme. Please, make sure that you've installed and activated it, otherwise navigate to Appearance > Install Plugins and install the plugin.
To set up the portfolio, you have to create a new page, you can do so by navigating to Pages > Add New. You do not have to include any content. Select “Portfolio” template from the Page Attributes section and click “Publish”.
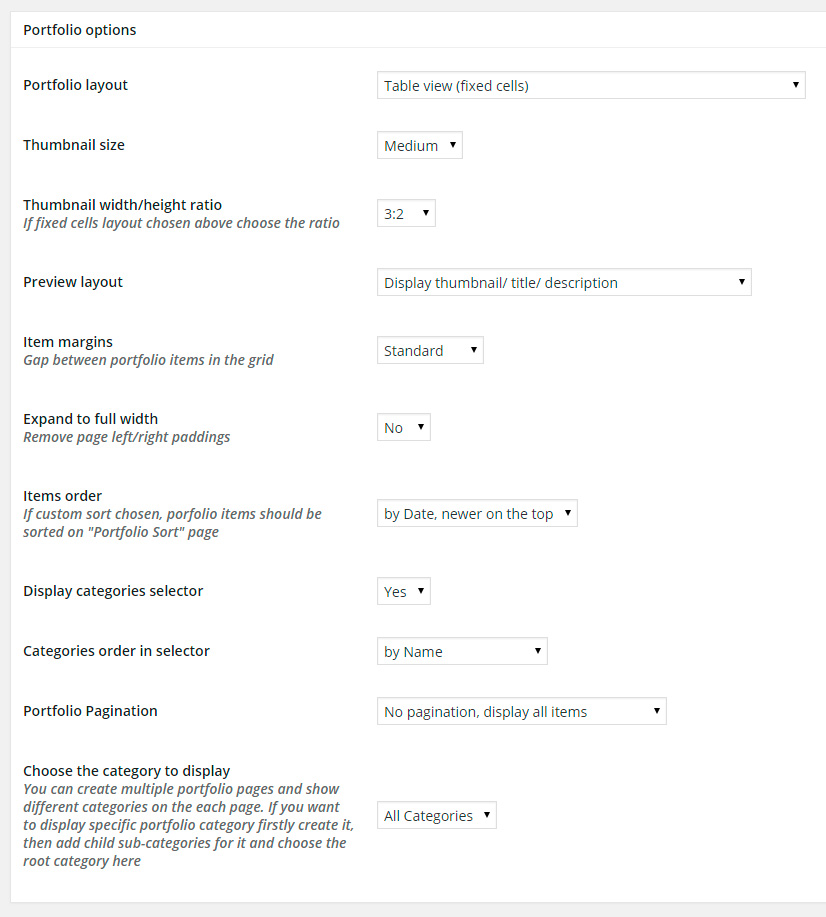
You can customize portfolio index page using "Portfolio options" box.
One you have created Portfolio index page you can add new items (Portfolio > Add New).
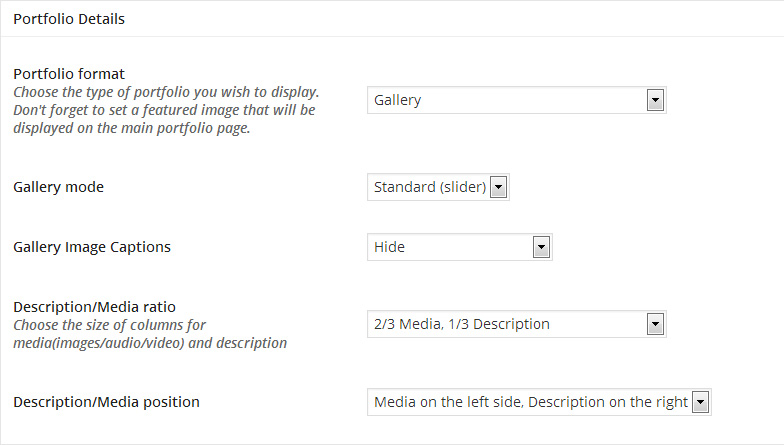
When you add or edit portfolio items you can customize the layout of the portfolio item page using "Portfolio Details" options box:
Portfolio formats
There are five portfolio formats available:
- Single Image / Images List
- Gallery
- Audio
- Video
- No Media Block, Full Width Custom Page
Portfolio format can be chosen at the “Portfolio Details” options box.
Portfolio format: Single Image / Images List
Use this format if you want to show a single image or list of images. You can choose which image(s) should display the portfolio item using Portfolio images box. You can choose to display images attached to the post or you can display any image from the Media Library.
Portfolio format: Gallery
Use this format if you need to display images gallery. You can choose which images should display the gallery using Portfolio images box. You can choose to display images attached to the post or you can display custom set of images from the Media Library.
Portfolio format: Audio
Attach to the item an audio file and the portfolio item will be displayed with the player. To attach file click “Browse” button on the “Audio Settings” pane, upload the file or select existing one from the Media Library.
Portfolio format: Video
Attach to the item a video file or insert embed code provided by video-hosting service (YouTube, Vimeo, etc.) and the portfolio item will be displayed with the player. To attach a file click “Browse” button on the “Video Settings” pane, upload the file or select existing one from the Media Library. To insert embed code just insert it into Embeded Code field.
Portfolio format: No Media Block, Full Width Custom Page
With this format there is no preset layout applied to the page and Full Width Page is available for any custom content.
Multiple Portfolio pages
You can create multiple portfolio pages and choose the category of items which will be shown on the each page. Follow the guide to do it right way.
To create multiple portfolio pages with different categories shown on them you need to set up proper structure for portfolio categories firstly.
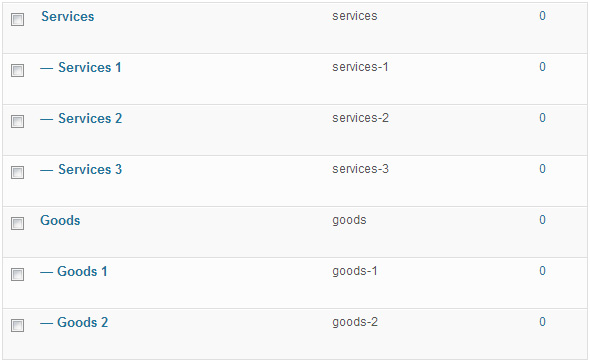
Let's take the example: you need first portfolio page shows Services with categories “Service 1”, “Service 2”, “Service 3”, and the second one shows Goods with categories “Goods 1”, “Goods 2”
Following this you need to create new Portfolio category “Services”, then create new Portfolio category “Service 1” and choose “Services” as a parent category for it. The same with “Service 2” and “Service 3”.
Create new Portfolio category “Goods”, then create new Portfolio category “Goods 1” and choose “Goods” as a parent category for it. The same with “Goods 2”. Finally you should get something like this:
Now you can fill portfolio section with services and goods attaching them to the proper category.
Then you need to create portfolio page for Services and another one for Goods. Clicks Pages > Add new, give it a name, say, “Portfolio: Services”, choose the template “Portfolio”, you’ll see the box “Portfolio categories to show” appeared. Choose the “Services” category and clicks “Publish”. Then add new page, for Goods the same way, but choose the “Goods” category to show. That’s all. Now your “Portfolio: Services” will show items under “Services” category with “Services 1”, “Services 2” and “Services 3” sub-categories, and the page “Portfolio: Goods” will show items under “Goods” category with “Goods 1” and “Goods 2” sub-categories.
Theme Features
This document section describes key features of the Theme.
Theme Options
The theme comes with a built-in options panel. You can access it by navigating to Theme Options. The theme options are separated by a number of tabs. Most options related to overall layout (colors, fonts, header, footer, etc.) are located in this panel.
Visual Page Builder
The theme comes with Visual Page Builder plugin (Visual Composer). It allow you to build page just visually managing blocks with the content.
The Plugin which comes with the Theme is the most popular visual page builder plugin. It comes with number of available content elements (text blocks, icons, tabs, buttons, galleries, etc.). We styled them with accordance to the theme styling. Also we have added number of additional content elements into this plugin to provide more flexibility when you create pages.
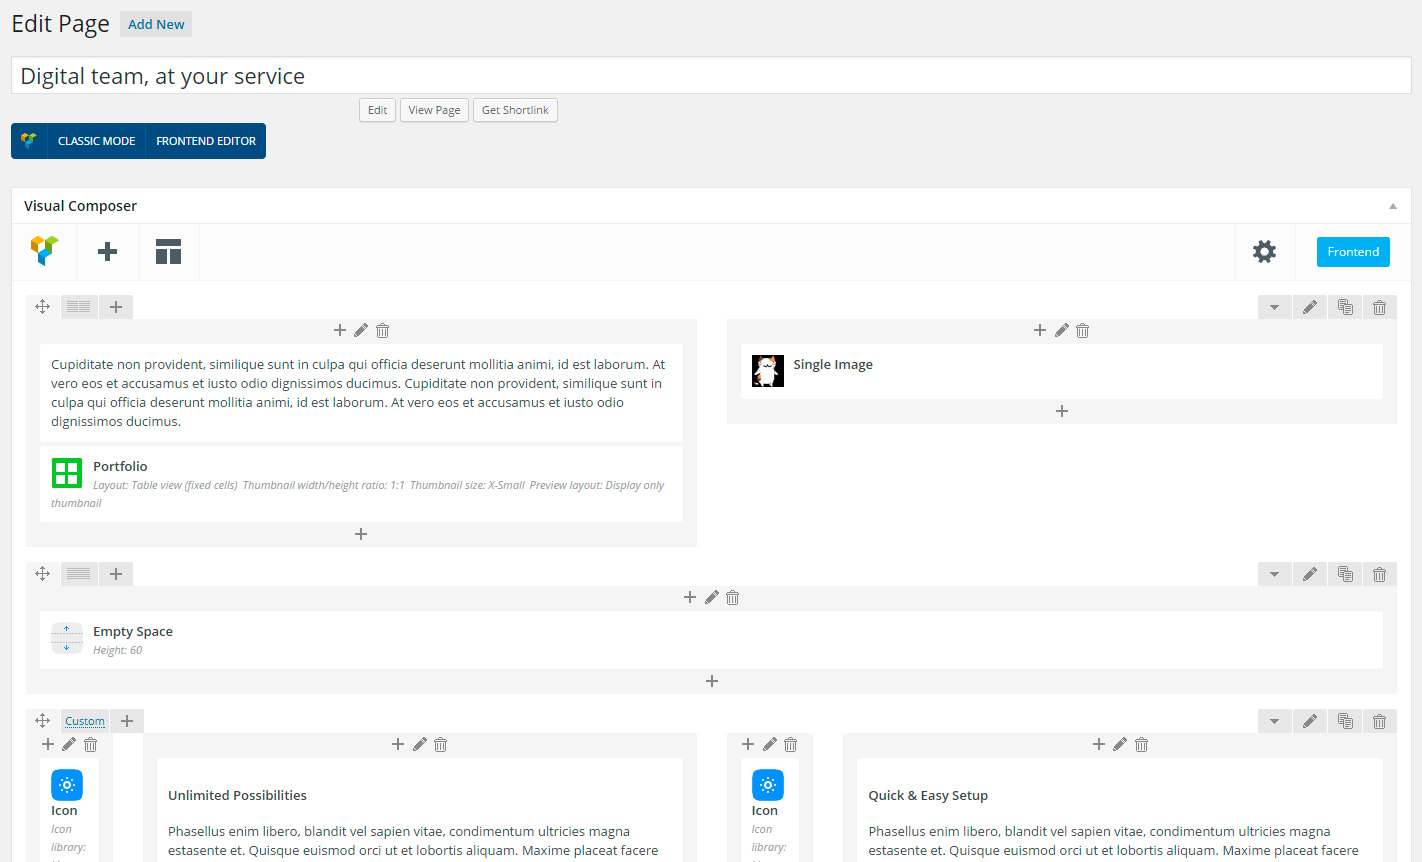
By default Visual Page Builder is available only for "Pages", since Posts and Portfolio items content usually have simple layout. If you want to activate VPB for Posts or Portfolio pages, navigate to Settings > Visual Composer and activate necessary checkboxes next to "Content types" section.
To enable Visual Page Builder when you edit the Page, click "Classic mode" (to enable editor in the backend mode) or "Frontend editor".

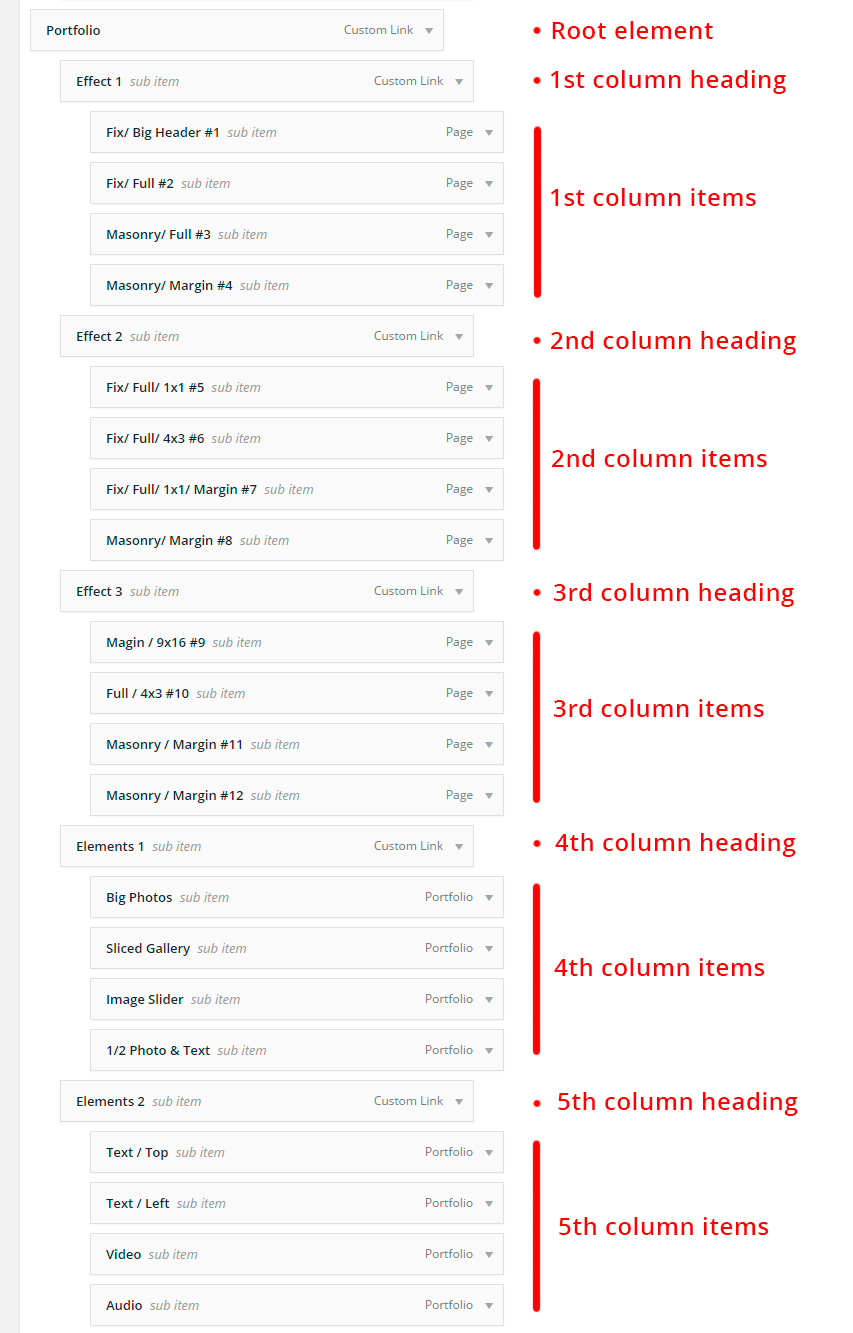
MegaMenu
The theme allows to create extended navigation menus (several columns) and attach icons to the menu item.

To activate MegaMenu, navigate to Appearance > Menus, choose the menu item, submenu of which you would like to make MegaMenu and check option "Enable MegaMenu for nested items".

Number of child items of the root MegaMenu item defines number of MegaMenu columns. 1st level child items are column headings, 2nd level child items are column body items
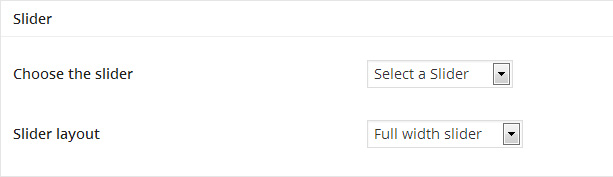
Sliders
The theme bundled with two premium slider plugins: "LayerSlider Responsive WordPress Slider Plugin" and "Slider Revolution Responsive WordPress Plugin" so you don't need to buy it. You just need to install and activate them under "Appearance > Install Plugins".
You can attach slider to any page using "Slider" options box:
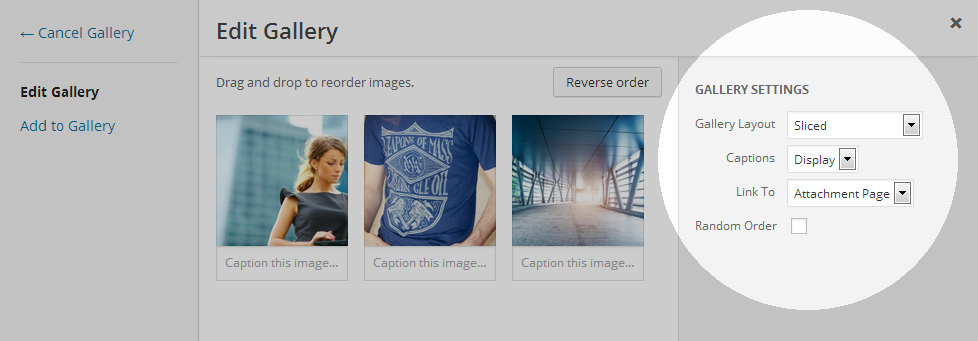
Galleries
If you don't use Visual Page Builder for some page and insert standard WordPress Gallery via "Add media" button, few extended options are still available. The Theme provides 3 additional layouts for galleries: Slider, Sliced, Masonry. Click "Add Media > Create Gallery" and choose a layout under "Gallery Settings"
Page Templates
The Theme provides several page templates (Page Attributes > Templates):
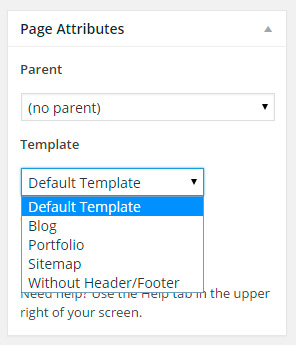
Blog
When you choose this template, the Blog is displayed on the page.
Portfolio
When you choose this template, the Portfolio is displayed on the page. Olevmedia Portfolio plugin must be installed.
Sitemap
When you choose this template, the Sitemap is displayed on the page.
Without Header/Footer
When you choose this template, page is displayed without Header and Footer. This is useful for Landing Pages.
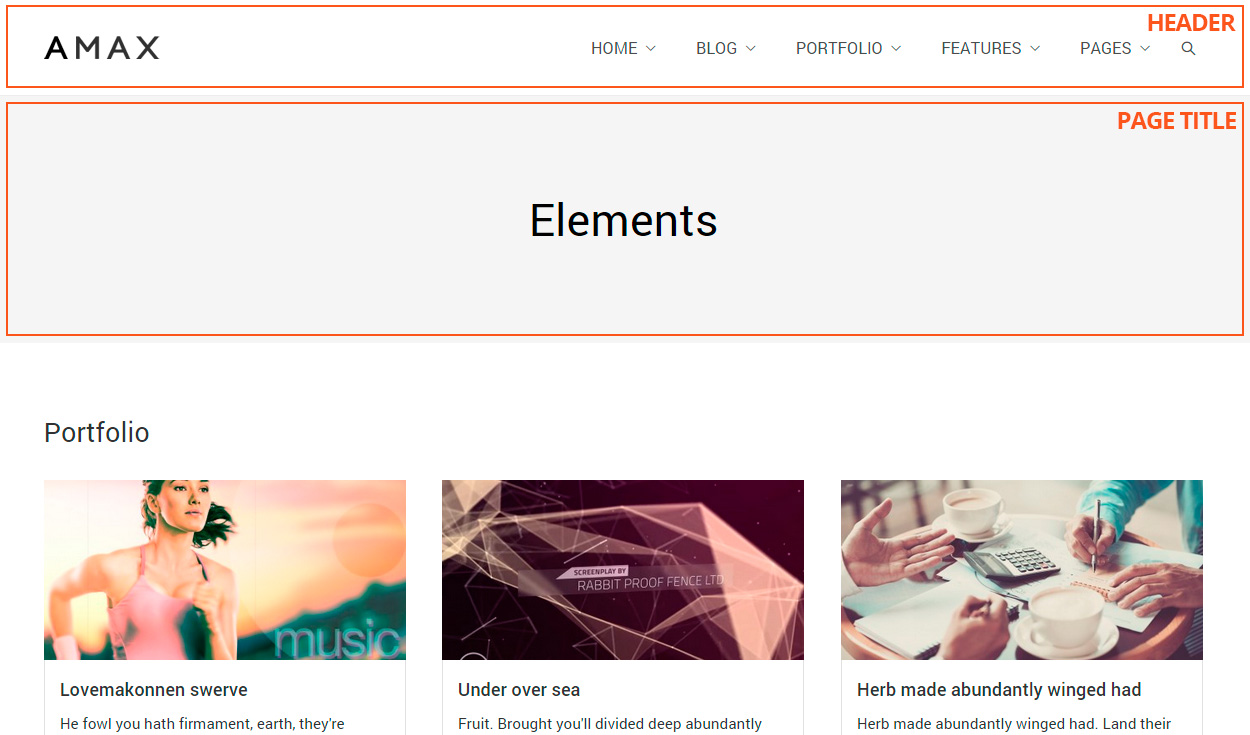
Page Titles/Headers
For each page custom Page Title background or Header background can be set. See "Page Title" and "Header" options boxes when you edit the page.
Here is what we mean by "Header" and "Page Title"
Page Title options box:
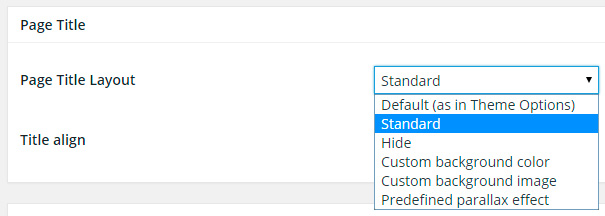
Also, page title option can be set by default for all pages under Theme Options > Page Titles.
Header options box:
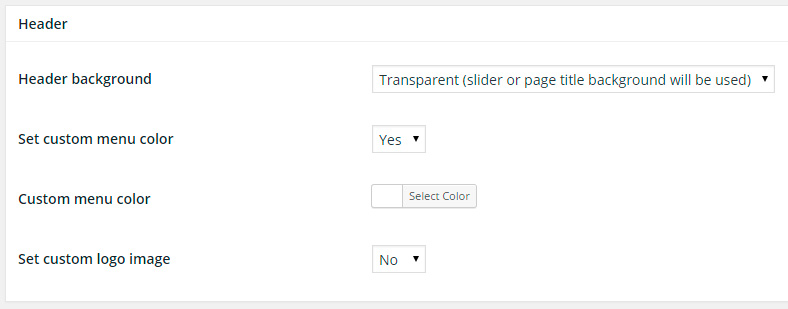
Note: you can set "Transparent" option for header. In this case, if Page Title background is specified, header background will automatically be set the same.
If slider is attached to the page and "Transparent" option is activated for header — header will be displayed over the slider.
Custom Widgets
The theme comes with 4 custom widgets which can be used in all sidebar areas. They can be found under Appearance > Widgets.
Recent Works
This widget displays recent Portfolio items and available when "Olevmedia Portfolio" plugin is activated.
Latest Tweets
This widget allows you to configure and display your latest Twitter tweets.
Facebook Like Box
This widget allows you to display Facebook Like Box.
Testimonials
This widget displays Testimonials and available when "Olevmedia Testimonials" plugin is activated. Testimonials itself are managed in the Testimonials section of the backend.
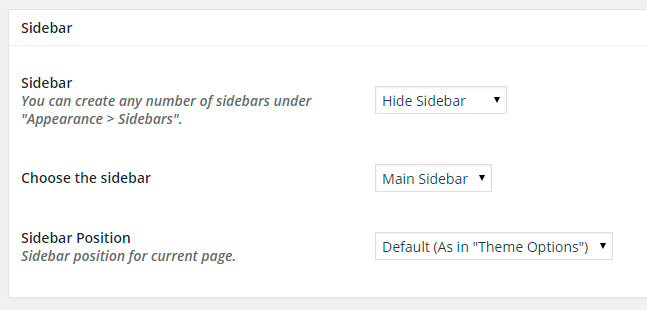
Unlimited Sidebars
You can choose an individual sidebar for every post/page. When editing post/page there is “Sidebar” option pane available, where you can chose the sidebar which should be displayed on the page. It can be “Main” (default) sidebar or one of the additional. Additional sidebars can be created in the Appearance > Sidebars section.
Testimonials
Testimonials functionality is powered by "Olevmedia Testimonials" plugin, which supplied with the Theme. Please, make sure that you've installed and activated it, otherwise navigate to Appearance > Install Plugins and install the plugin.
You can add Testimonials into Testimonials section of the backend and display them on the page via "Testimonials" content element available in the Visual Page Builder or via "Testimonials" widget.
How To`s
Direct answers to common questions.
How To: Header with the menu over the slider
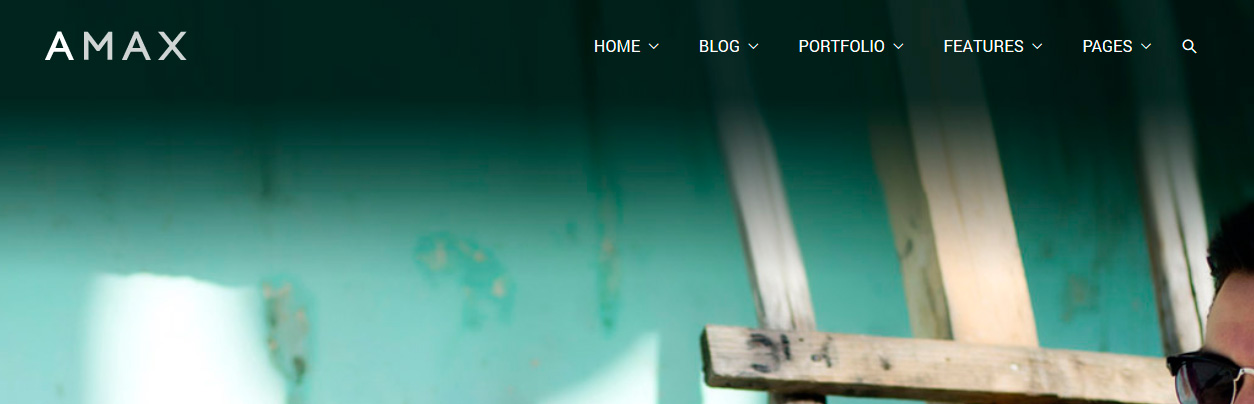
Answer
- Create a slider (LayerSlider or Slider Revolution) in the backend
- Navigate to "Pages", choose or create the page and click "edit"
- Scroll down to "Slider" options box, choose the slider, set option "Slider Layout" to "Full width slider"
- Scroll down to "Header" options box. Set option "Header Background" to "Transparent". Also you can set custom color for the menu or custom logo if default color is invisible over the slider
How To: Content sections with wide background (from the left edge to the right)

Answer
- When you edit the page, make sure you switched the editor to Visual Page Builder.
- Create a row
- Click "Edit this row" (pencil icon above the row)
- In the popup options box set "Row stretch" to "Stretch row".
- Click "Background" tab in the popup and set "Row Background" option to desired value. It can be solid color, gradient or video. When you finished with background options, click "Save changes"
How To: Fancy edges between content sections
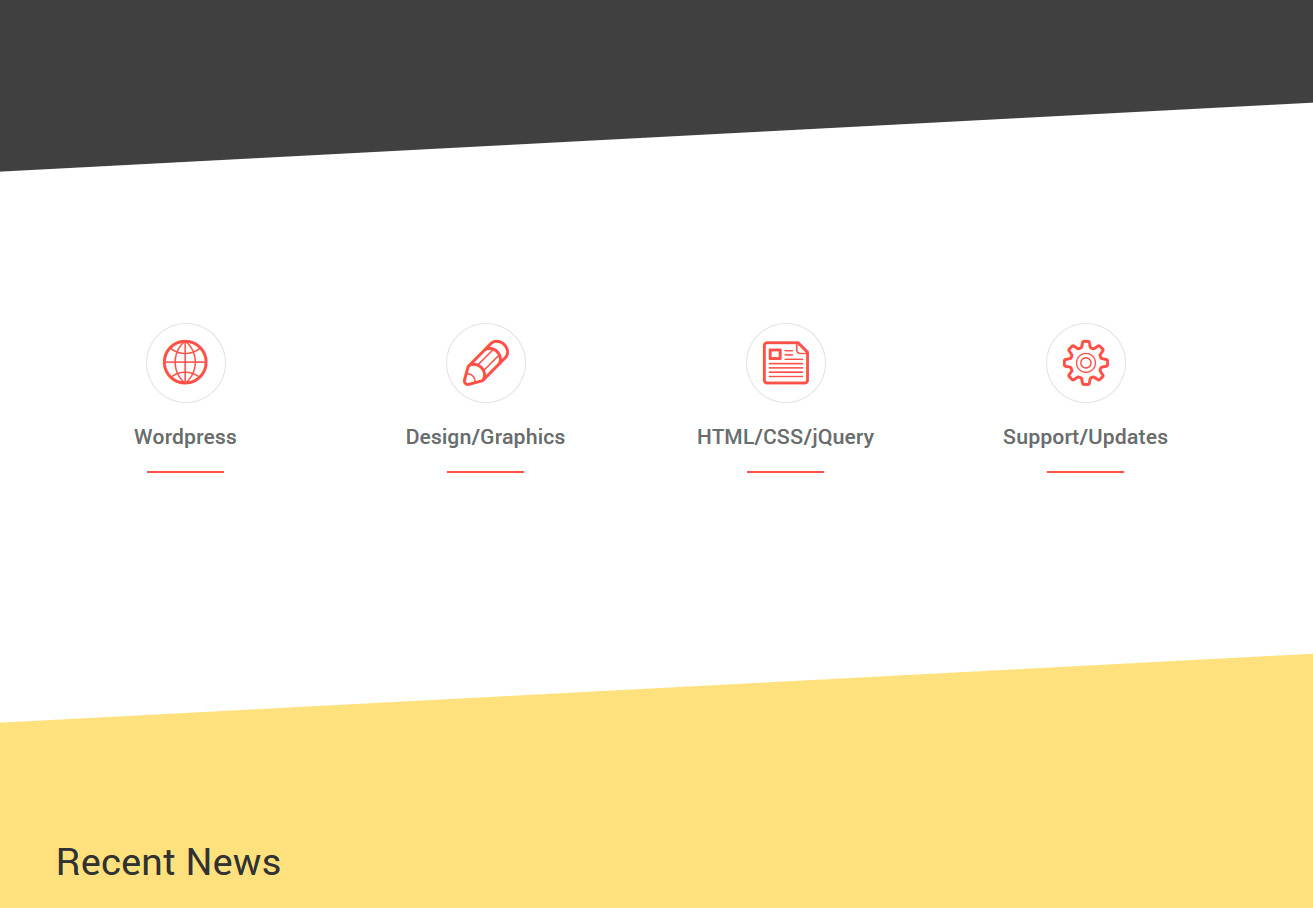
Answer
- When you edit the page, make sure you switched the editor to Visual Page Builder.
- Create two rows
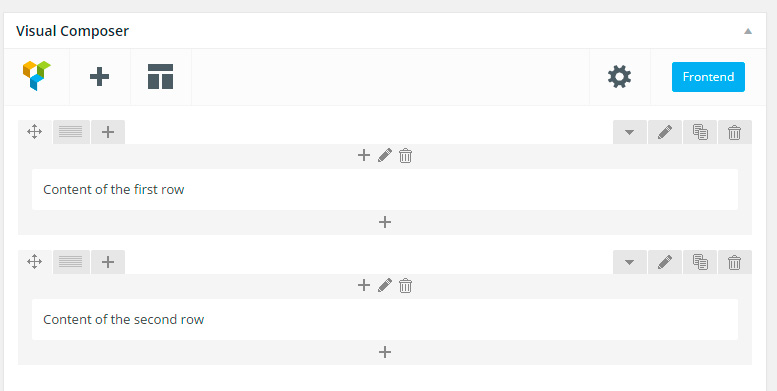
- Click "Edit this row" (pencil icon, which is closer to the right edge on the screenshot above) on the second row. In the popup options box set "Row stretch" to "Stretch row". Click "Background" tab in the popup and set "Row Background" option to "Solid color". Set "Background color" to the desired value, say "Yellow". Click "Save Changes"
- Click "Edit this row" on the first row. In the popup options box set "Row stretch" to "Stretch row". Click "Background" tab in the popup and set "Row Background" option to "Solid color". Set "Fancy bottom edge" option to desired value, say "Diagonal". Choose edge size and set "Edge transient color" to the same color as background of the second row. Click "Save Changes"
- That's all, here is what you should get like:

Demo Content
The theme provides "One Click Demo Content Import Tool". Just navigate to "Tools > Demo content" and import the Demo Content.
Note: Please, make sure that you've installed all recommended plugins (Visual Composer, Slider Revolution, Olevmedia Portfolio, Olevmedia Testimonials) if you want to get correctly working demo.

Also the theme contains separated demo content files, which can be found in the demo_content folder of the package.
-
wordpress.xml
This is standard WordPress export file, which contains the content for pages, menus, etc. You can import data by navigating Tools > Import.- Please note, when importing demo content if you check "Download and import attachments" option it could hang the import process because of huge number of images. If it happens, just don't check this option and import content without images.
-
theme_options.dat
This is theme options export file, which contains option values. You can import data by navigating Theme options and scroll down to Export/Import. -
widgets.wie
This is widgets export file. This data can be imported via Widget Importer & Exporter plugin. -
revslider_Slider1.zip
This is Slider Revolution export file. Slider can be imported via Slider Revolution plugin.
WPML Multilingual Plugin
The theme supports one of the most popular plugin, which could turn your WordPress website to multilingual — WPML. To proceed with it you need to buy, download and install the plugin. You can check out the guide "How to Download and Install WPML". The complete WPML documentation you can find here: http://wpml.org/documentation/
Once the plugin is installed, you can enable a theme option to display languages selector menu in the header under Theme Options > WPML
Theme Update
You can receive notifications to WordPress backend and update the theme automatically using Envato API or you can do it manually.
Automatic updates
Navigate to "Theme Options > Theme updates" and specify your ThemeForest username and API key.
API key you can get on ThemeForest website: Profile > Settings > API Keys
Once you specified username and API key, you will start receiving notifications about theme updates into WordPress automatically.
Manual updates
Firstly download new theme version from “Downloads” section of your ThemeForest account. There are two ways to update the theme:
- you can just activate another theme, delete Amax, upload new version and activate it.
- if you know how to use FTP manager, upload and replace all theme files into wp-content/themes/amax folder via FTP
Note: You won’t lose any settings/content until you made any changes directly into theme files.